Today, we will finish up our 5 part small backyard Japanese garden design. We will add a tsukubai, ornaments, and a few more plants. Finally, we will see how this design could look if built.
Here is how we left our design. You can click on the images to make them larger. You then need to click “Back” in your web browser to return here.

Now lets finally add that water feature I promised in the 1st post.
Tsukubai, a Japanese garden water feature
We could have built a pond, stream, waterfall, or pondless waterfall, but those would have taken a bit of space and expense. Instead, we are opting for a simple tsukubai or water basin.
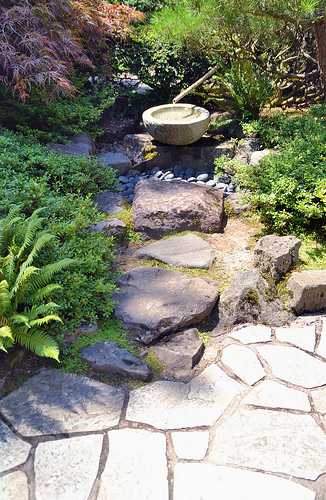
photo credit: jpellgen via photopin cc
A tsukubai is a contribution of the traditional tea ceremony to the Japanese garden design repertoire. Guests to tea houses were supposed to enter the tea room pure in mind and body.
The garden was provided to relax the mind and a tsukabai for washing the hands. Tsukubai are typically low and flat to encourage humility in guests by requiring them to bend down.
Since in our garden this is more for visual interest, I have shown it taller to enhance it’s visibility from the house. Traditional or not, either would work. It should be made of stone in some form.
Here is our design with the water basin added:
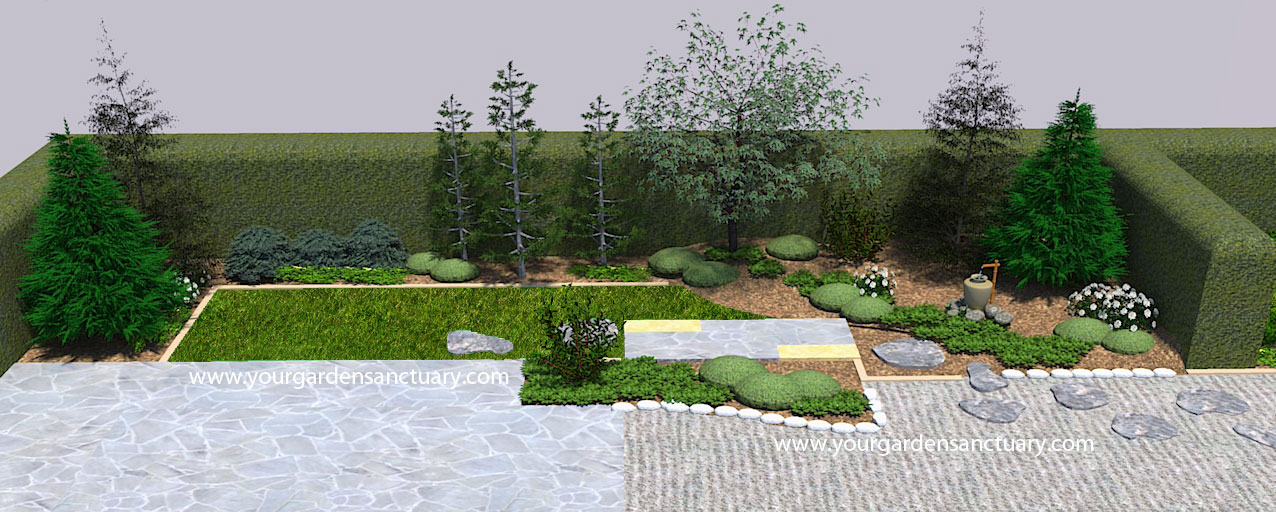
The water basin looks a little sparse alone. We will alleviate this by adding ferns around it as well as in the landscape bed closer to the house. This will help to tie the two areas together.
One fern we could use is Lady fern (Athyrium filix-femina). Lady fern takes quite a bit of sun as long as it receives adequate moisture. Another couple that would work are Cinnamon fern (Osmunda cinnamomea) or Christmas fern (Polystichum acrostichoides).

A couple ornaments added
The last element we will add to our garden design are a couple of “ornaments”. The first being a stone Japanese garden lantern which we will add along with a fern in front of the Japanese maple. This lantern with the fern next to it is similar to the tsukubai with the ferns around it. The ferns will make these two elements seem visually connected.
Next we will add will be a bird feeder on a stand. This will help to attract birds and bring the garden scene to life when looking out upon it from the house.
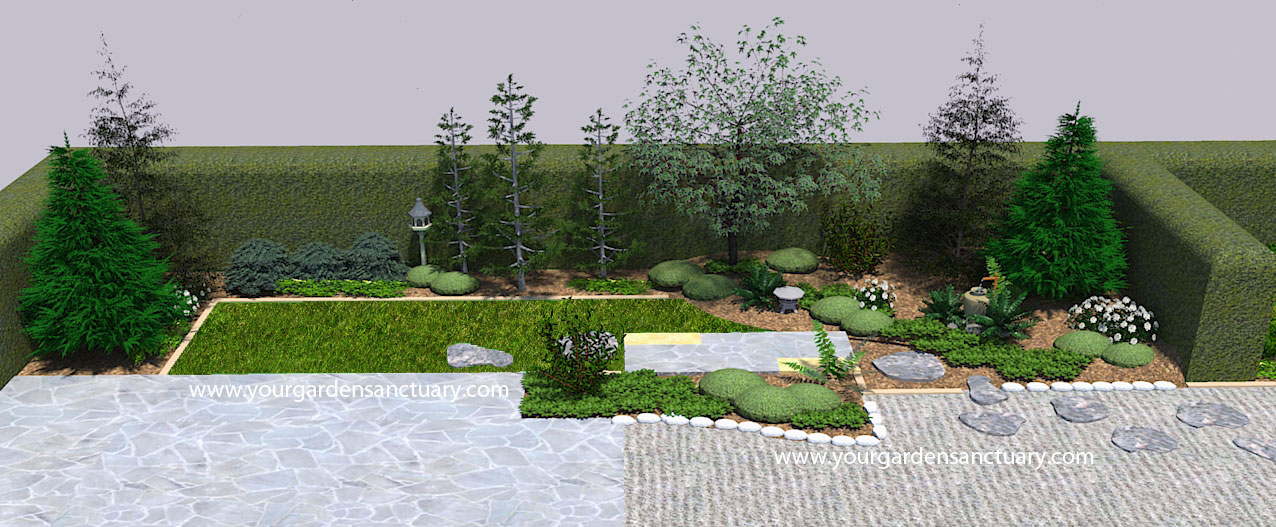
Now lets see how this design would look from different views.


