Why is planting plugs instead of larger plants in a landscape often a better idea? Let’s start planting the landscape design for my backyard and I’ll show you.
Since I am a gardener and not a landscaper, we will be installing this design over time. Why have all the fun at once when it can be spread over the years.
If I was a landscaper, I would want you to buy the largest (most expensive) plant possible, certainly not plugs!
The area we will be working on first is the shoreline and one of the adjacent beds.
Step 1 to Planting Plugs is to kill the existing turf & weeds
Our first step was to kill the grass in the lawn and the weeds in the shoreline.
Well the grass at least. I pulled the weeds in the shoreline and I am sure they will come back requiring follow up weeding.
On the turf, I used an aquatic grade of Glyphosate as an extra precaution as the normal formulations of Glyphosate are extremely toxic to aquatic life. I did not get anywhere near the water, but since I had it, I figured I would use it.
There are other ways of killing the turf such as shading or solarizing. I am testing solarizing using part of my side yard and am having promising results (more on that another time).
I could have also removed the turf with a sod cutter but given this location near the lake it would have caused some nasty soil erosion. It also would have exposed lots of fresh soil. That would undoubtedly have tons of weed seeds just waiting to see a little sun to germinate. The dead sod in place prevents that.
While I would have preferred not to use Glyphosate, as this is the only time I will be using any chemicals in this bed, I am OK with this application.

While I could have used my Shore-Klear herbicide on the shoreline if I got a permit, there are other more ecologically safe ways to deal with the weeds in the rip rap.
I decided to just pull the weeds where I would be planting. What a novel idea! Plus the areas I had to weed were not that large as I was only planting plugs of Blue Flag Iris.

Flaming Weeds instead of spraying
I did flame the other weeds in my rip rap using a propane torch weeder with my daughter dutifully standing by with a hose. Flaming the weeds does not mean actually starting them on fire. It just kills their top growth by heating them and rupturing their cells.
Established perennial weeds will grow back from their roots. That’s OK, we just have to torch them again a few times till the roots energy reserve is exhausted and the plant dies.
I scared away any frogs or other wildlife by walking the waters edge first. I am sure one killed frog would have traumatized my daughter from ever helping me again!
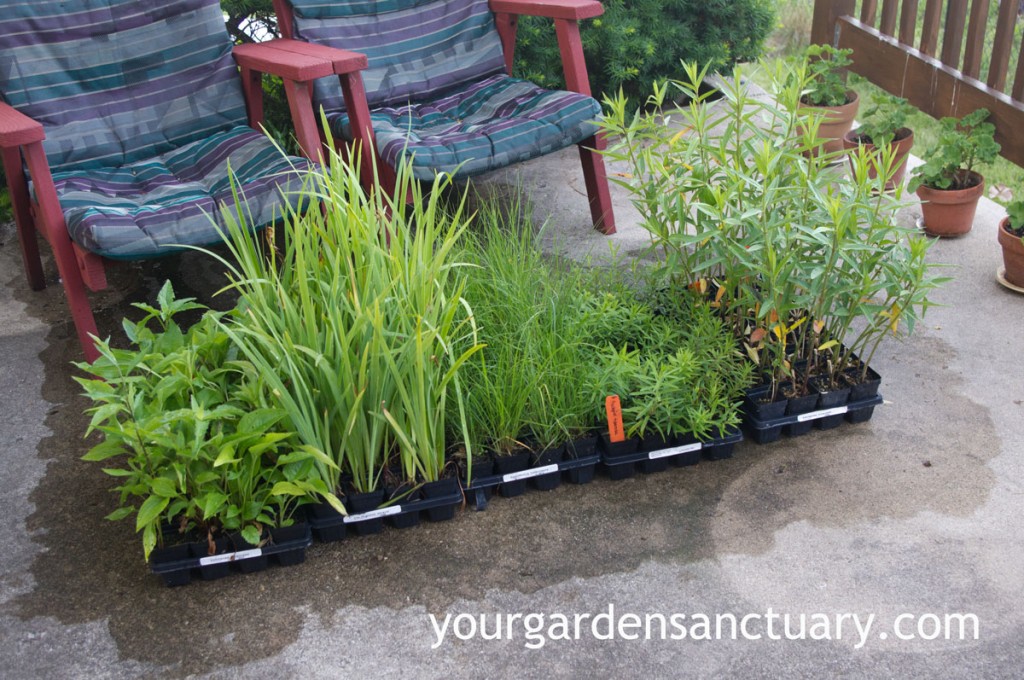
Step 2 to planting plugs is to obtain the plants
The majority of our plants in this bed will be Purple Coneflower, Butterfly Weed, Swamp Milkweed and Prairie Dropseed. As mentioned above, I am also am planting Blue Flag Iris in the rip rap shoreline. These were obtained from a local native plant nursery.
Planting using plugs offers three main advantages:
- Lower plant prices,
- Ease of planting, and
- Quicker plant establishment as the roots rapidly establish themselves down into the soil
Perhaps the best benefit is the better long term health of the plant as all of it’s roots are growing in the native soil. This makes the plant much more resistant to drought and other stress!
There are other benefits of planting plugs including plants that are easier to handle and have a lower environmental impact of growing and transporting them.
You can save a lot by planting plugs
In our area, most plugs cost about $2.50 retail while 1 Gallon perennials average about 4 times that.
Plugs are smaller plants but by next year they will be as big as the 1 gallons and you will have saved a bunch. One hundred plants times $7.50 savings per plant over 1 Gallons equals $750 saved. For that price, I am willing to wait a year for them to grow. Plus I will have a healthier more resilient planting that is better able to withstand drought and other stresses.
There is a cost in the extra weeding I will need to do with these smaller plantings and the larger spaces between the plants. Although they will establish into the soil quicker and will need watering for a shorter period of time.
Taking a Look at the Design
Before we get on with planting plugs, lets look at the design. The basic theme and plants from my backyard design remain the same, but I tweaked it a bit. The biggest difference was the swamp milkweed was moved next to the fence at the border of my property.

I did this for several reasons. One, it is a low point in the yard that is one of the wetter areas. This makes it a better spot for the swamp milkweed which likes wet soils. The other reason was that I really wanted to keep the plantings low as to not block any of the view either to or from the water.
Adding plants to increase diversity
I also added in a bit more diversity in the planting than my original plan had. I did this to add different bloom times as well as more variety of butterfly attracting plants to my garden. Perhaps you want a cultivar that is especially ornamental or shorter growing. In those cases you will probably have to get a larger 1 Gallon or at least quart sized plant. Here are the plants I added to the original plan:
- Little Lemon Goldenrod (3)
- Sand Coreopsis (3)
- Phantom Joe Pye Weed (1)
- Blue Ice Amsonia (3)
All were 1 Gallon containers except for the Sand Coreopsis that were a little smaller at 4 1/2″ pots.
Some plants are also very slow growing, so you will want to plant a larger sized one. Blue Wild Indigo (Baptisia australis) would have taken just too long to grow from plugs. Plus I only needed one.

Step 3 is actually planting plugs into the landscape
The first area we planted was the rip rap. This was less about digging holes than moving rocks out of the way.
Me and my helper quickly planted one 32 flat the Blue Flag Iris in the mucky soil/boulder shoreline at the water line.

The Iris plantings will need to be weeded regularly.
I will continue to Flame weed the rest of the shoreline a few times a year till I effectively kill all the Yellow Nutsedge (Cyperus esculentus – bad plant!) that is currently growing in it. I expect to plant this in the Fall of 2017 with native sedge including Tussock Sedge (Carex stricta) and Fox Sedge (Carex vulpinoidea) (good plants!).

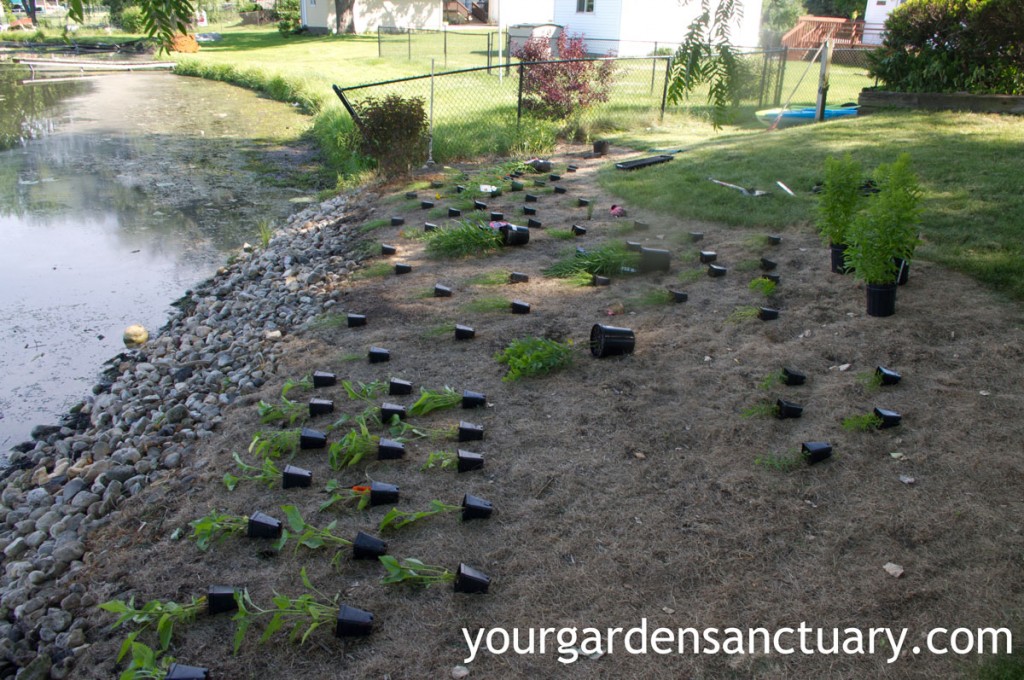
Laying out the plants in the bed
This is where the real fun begins. I begin by laying out the plants I only have a few of, such as the Baptisa and Coreopsis.
I use the plan as inspiration, but always look at the site more than the paper.
Siting the plants always requires shifting some here and there to match the reality of the site. This is where you need to take time and really look at the site. Don’t rush this stage as it is a lot easier to plant a plant one time instead of several times.

Planting plugs using the Pro Plugger
I love this simple made in America Tool! The Proplugger is my favorite planting tool. This is a great for transplanting plugs and can be used take plugs of existing plants such as Sod or other ground covers.
You don’t need this tool to plant plugs, but you should use a bulb planter, drill bit soil auger or other tool that only digs the hole where the plant will go.
You DON’T want to till your soil and plant the plugs into a nice bed of freshly turned soil that every weed in the neighborhood will find. Leave the dead sod in place and only make a hole large enough to fit your plug. This will dramatically reduce the amount of weeds you will have to deal with. I can not emphasize this enough!
My helper started with the Swamp Milkweed patch.

From there we moved on to the rest of the bed. I dug holes for some of the one gallon plants, but for all the plugs I used the Pro Plugger. It took longer to plant 12 one gallon plants than it took to plant over 100 plugs.


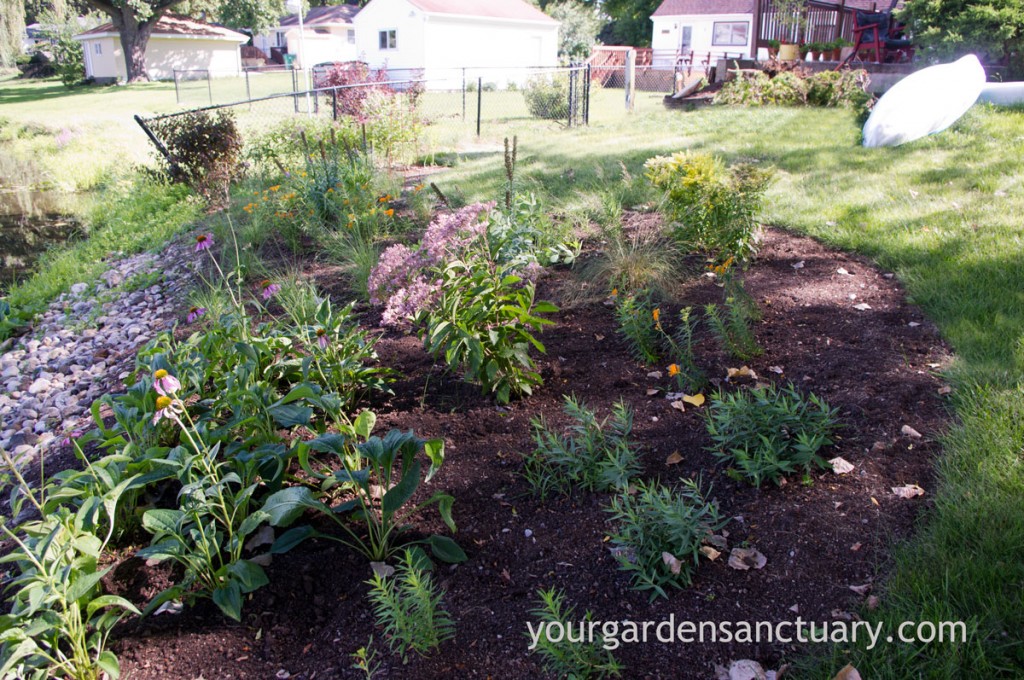
Applying mulch after planting plugs
Here is the planting with the mulching almost done. The mulch I used was compost. The soil did not need the additional nutrients the compost added, but my preferred mulch of shredded oak leaves was not available.
Wood mulch would actually smoother the plugs and inhibit their growth. I wanted to mulch them with something that they can actually grow through that will decompose over the year. Wood mulch stresses the growth of perennials. Leaf much or compost does not. They also do just as good of a job of keeping the sun off of the weed seeds to prevent them from germinating.

As this planting matures, these plants will grow into each other and form a tight planting with no bare ground exposed. This will keep weeds out and look great year around. In March, I will mow the entire planting down with a lawnmower. I will leave the chopped up leaf debris to cover the soil and return nutrients to the soil and ultimately the plants.
I will add some additional Spring blooming plants in the form of bulbs and Spring Ephermals such as Shooting Star (Dodecatheon meadia) and perhaps some low growing natives that can fill in around bare spots. But that will have to be another post.
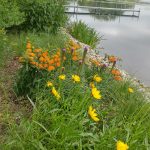
To finish up this let’ take a look at how the planting looks just a couple of months after planting.


steve says
August 14, 2016 at 4:47 pmHi Jim,
Great planting mate. Love the fact the flowering period is extended.
Regards
steve
Andrea says
September 1, 2016 at 7:02 pmThanks so much for your detailed post about using plugs. I recently became aware of plugs as an alternative to larger sizes. I am a homeowner so am wondering if you could share some sources for plugs.
I am located in Northern Virginia and happy to order online and have shipped if the numbers work.
Thank you
Jim says
September 1, 2016 at 9:05 pmThat is the hard part. North Creek Nursery is a great source but is WHOLESALE ONLY, so that won’t help you.
Your best bet will usually be native plant nurseries that are in your area. I could recommend some from the Midwest that would ship, but you really want native plants grown from seed source in your area. Take a look at this site for a list of some of those in your area https://vnps.org/conservation/plant-nurseries/.
You can always search for Native plant nurseries and your specific location for a more localized list. I hope this helps.
Monja says
July 31, 2017 at 12:09 pmAndrea, Did you ever find a good plug source ? I am northern Virginia too
Becky Kennedy says
July 1, 2017 at 3:36 pmGreat advice. Thank you!
Laurie Cross says
October 12, 2017 at 4:58 pmLove your lakeside planting. I bet it was outstanding this year.
Any suggestions for non-wholesale plug suppliers in northeastern Illinois or Wisconsin? Will Midwest Groundcovers sell plugs to homeowners? Any scoop will be appreciated.
Jim says
October 14, 2017 at 11:18 pmPrairie nursery will ship plugs. They sell mixed flats but you pay a premium for them over one specie flats.
Angela S says
September 20, 2018 at 3:00 pmI recently moved to McHenry County & want to transform my yard into a haven for pollinators & birds. I just received a planned garden kit from https://www.prairienursery.com/. They’re expensive, but high quality.
Jim says
September 20, 2018 at 5:32 pmThat is a good start assuming the preplaned kit matches your site conditions.